Interactive Popup Modals
Detailed highlight on creating engagement-focused popup modals that show announcements on page load or login.
Popup Modals are one of the most effective tools in the Admin Portal for grabbing a student's attention. Unlike standard notifications, these modals appear as a layer over the current page, requiring the user to acknowledge them before continuing.
1. Why Use Popup Modals?
Modals should be used for content that is high-priority or time-sensitive. Common use cases include:
- Promotions: Offering a discount on a new practice course.
- Welcome Messages: A first-time setup guide for new students.
- Critical Alerts: Informing students about major system changes or maintenance.
- Feature Spotlights: Highlighting a new tool added to the platform.
2. Accessing the Modals Section
- Navigate to the Communication section in the admin sidebar.
- Click on Modals (sometimes labeled as Popups).
- This page lists all active and inactive modals created for your portal.
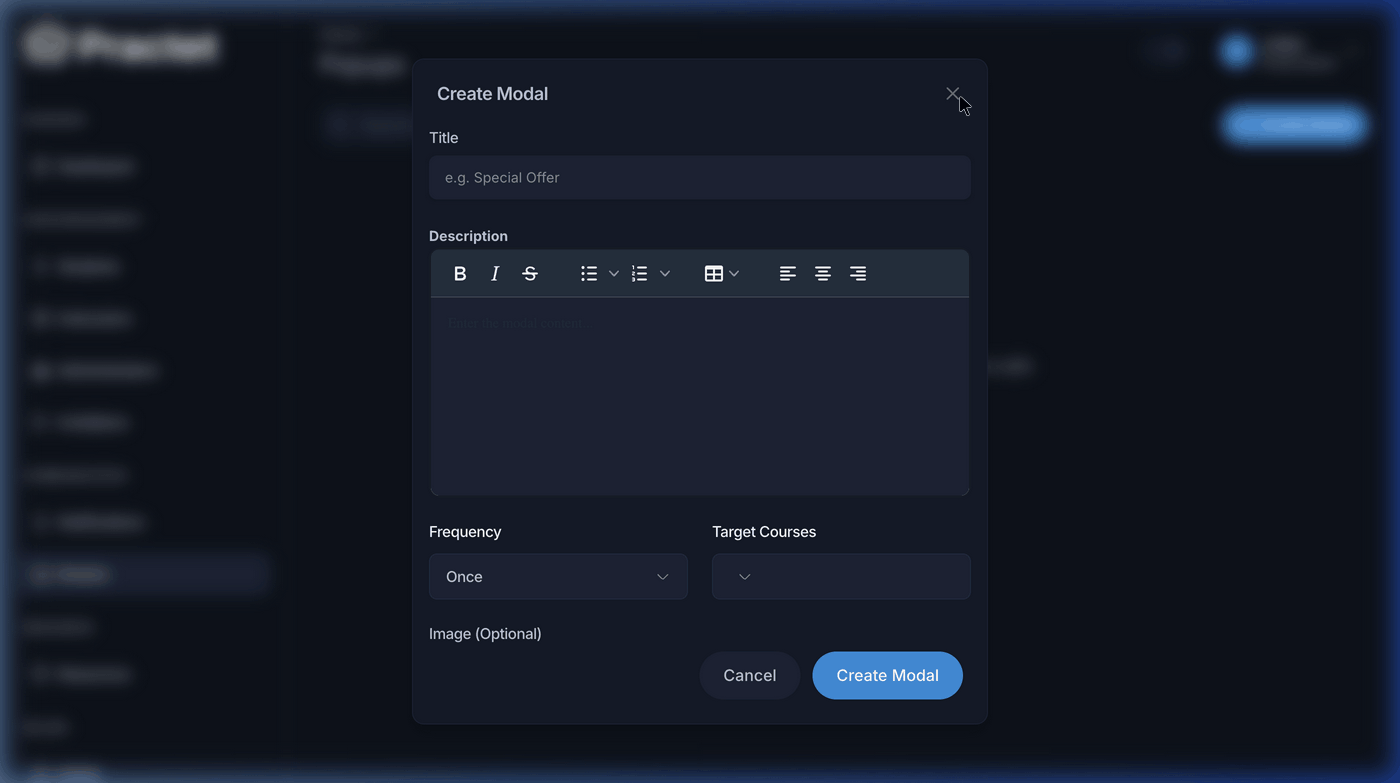
3. Creating a Detailed Modal (Field Breakdown)
Click the Create Modal button to open the advanced configuration form. Here is a breakdown of every available setting:
A. Title & Headlines
The title appears at the top of the modal. Keep it short (e.g., "Special 20% Discount for May!").
B. Rich Text Content (The Body)
The editor allows you to format your message with:
- Bold/Italic text for emphasis.
- Bulleted Lists for readability.
- Hyperlinks: Link directly to a payment page or a new resource.
- Alignment: Center your text for a professional look.
C. Frequency & Display Logic
This is the most critical setting to prevent "popup fatigue":
- Once: The modal shows up exactly one time for the student. After they close it, it will never show for them again.
- Every Session: The modal appears once every time the student logs in. If they refresh the page, it won't show again until their next login.
- Always: The modal appears every time the target page is loaded. Use this sparingly!
D. Audience Targeting (Target Courses)
You can choose to show the popup only to specific students based on their enrolled courses. For example, show an "Advanced Writing Guide" popup only to students enrolled in the "PTE Academic" course.
E. Visual Assets (Optional Image)
You can upload an image (banner or icon) that will be displayed within the modal. A visual representation of a discount or a "Congratulations" badge significantly increases student engagement.
4. Workflow Example: Creating a "Flash Sale" Popup
- Title: "24-Hour Flash Sale: All Mock Tests 50% Off!"
- Content: "Expand your practice with our premium mock test packs. Click here to upgrade your subscription now!"
- Link: Highlight "Click here" and add the URL to your Billing or Plans page.
- Frequency: Set to
Every Sessionso they see it once each time they log in to study. - Target: Set to
Allto maximize reach.
5. Managing and Deleting Modals
From the Modals dashboard, you can view the status of all popups.
- Active/Inactive: You can usually toggle a modal on or off without deleting it.
- Cleanup: If a promotion has ended, ensure you delete or deactivate the modal so it no longer interrupts the student experience.
[!CAUTION] Avoid Popup Overload! Showing more than one modal at a time can lead to a poor user experience. Always check your list of "Active" modals before creating a new one.
You might also find these helpful
Still need help?
Couldn't find what you were looking for? Our support team is ready to assist you with any questions.Contact us